COURSE
NR305: RN Health Assessment
Select an Option to Complete this Assignment
There are 3 options for creating your Visual Teaching Tool. Be sure to choose a format that makes sense for your selected topic, population, and setting. For example, if will be teaching adults at a health fair, then an educational brochure would be an appropriate choice. You must use the Patient Teaching Plan you have developed in this course to create your Visual Teaching Tool.
Option #1 – Power Point
Directions:
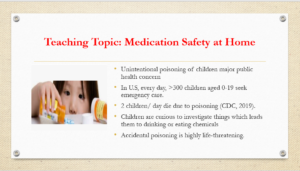
- Create a 6-8 slide Power Point presentation for your selected population setting.
- The goal of this Power Point Presentation is to address the three learning outcomes you developed in the Patient Teaching Plan. Once the learner has viewed your Power Point, all three of the learning objectives should have been met. For Example:If a learning objective in the teaching plan is: “At the end of this education, the learner will be able to demonstrate the proper way to wear a bike helmet,” then there should be content in your Power Point related to how to properly wear a bike helmet.
- Tips for a great Power Point presentation:
- Be creative! Choose a design (from the design tab of the PowerPoint presentation) to enhance visual appeal.
- Incorporate graphics, clip art, or photographs to increase interest.
- Use words and phrases suitable for your selected population.
- Avoid writing paragraphs. Use simple sentences and bullet points.
- Cite all sources used to create the educational content with (author, year).
- Proofread for spelling and grammar errors prior to final submission.
Option #2 – Educational Brochure (Using Microsoft Word)
Directions:
- Open Microsoft Word, and select create a New document. Under the Education option, select Education Brochure. This will provide you with a blank tri-fold brochure template. You can change the design, insert graphics, and create text as you wish.
- The goal of this Educational Brochure is to address the three learning outcomes you developed in the Patient Teaching Plan. Once the learner has viewed your Educational Brochure, all three of the learning objectives should have been met.
For Example:If a learning objective in the Patient Teaching Plan is: “At the end of this education, the learner will be able to demonstrate the proper way to wear a bike helmet,” then there should be content in your Educational Brochure related to how to properly wear a bike helmet. - Tips for a great educational brochure:
For Example:- Be creative! Choose a design (from the design tab of the PowerPoint presentation) to enhance visual appeal.
- Incorporate graphics, clip art, or photographs to increase interest.
- Use words and phrases suitable for your selected population.
- Avoid writing paragraphs. Use simple sentences and bullet points.
- Cite all sources used to create the educational content with (author, year).
- Proofread for spelling and grammar errors prior to final submission.
Option #3 – Infographic (Using a free Canva Account)
Directions:
- If you are tech savvy and feeling creative – create an infographic! Infographics are a way to communicate information visually, through a combination of text and graphics. Infographics have become a popular way to present facts and ideas in an efficient, yet effective way. Healthcare related organizations, like as the CDC, regularly use infographics to assist individuals with limited background understand health-related topics. This form of education can be helpful for patient populations with low-literacy levels, or to simplify a complex topic. Perform a web search to learn more about infographics, view examples, and understand how they are utilized.
- The goal of this Infographic is to address the three learning outcomes you developed in the Patient Teaching Plan. Once the learner has viewed your Infographic, all three of the learning objectives should have been met.For Example:If a learning objective in the Patient Teaching Plan is: “At the end of this education, the learner will be able to demonstrate the proper way to wear a bike helmet,” then there should be content in your Infographic related to how to properly wear a bike helmet.
- Follow this link https://www.canva.com/create/infographics/ (Links to an external site.) to the Canva website, and sign up for a free account.
- Please note that there are options on this website that require payment. You should be able to create your infographic without spending money or providing any payment information. Choose graphics and designs that are free of charge
- There are sample infographics on the website to get you started, and a Help section if you have questions. You can also perform a web search to find examples of infographic designs. Faculty are not able to provide technical support for Canva.
- You will be able to start an infographic, save it to your account, and edit it later.
- When your infographic is complete, you will need to download and save to your computer in order to submit to Canvas for grading. Select the PNG (recommended) saving option.
- Tips for a great infographic:
- Be creative! Select an eye-catching design to enhance visual appeal.
- Incorporate graphics, clip art, or photographs to increase interest.
- Use words and phrases suitable for your selected population.
- Avoid writing paragraphs. Use simple sentences and bullet points.
- Cite all sources used to create the educational content with (author, year).
- Proofread for spelling and grammar errors prior to final submission.
Solution
 …………….please follow the link below to purchase the solution at $10
